The latest update of the WooCommerce ecommerce plugin includes a new tabbed My Account page template to a allow for easier user account navigation. Unless you have a purpose built WooCommerce theme, the new WooCommerce account page layout on the front end for users will be functional but won’t look that great for the user. From what I tested tested so far, the WooCommerce account page in Genesis Framework themes is not ideal and clunky at best.
Today we are going to run through a quick one minute fix that you can do to help clean things up on the account page.

First up, login into your website install via FTP and navigate to /wp-content/plugins/woocommerce/templates/myaccount/ and copy the my-account.php to your the theme folder.
As this is a WooCommerce template file, we will need to ensure that we copy the template folder hierarchy within our theme folder. Create a folder called “woocommerce” in the top level of your theme’s folder. Then within this woocommerce folder create another folder called “myaccount”, and lastly add the new my-account.php file to this myaccount folder.
So the location of this new file should look something like this: /wp-content/themes/Your-theme-folder/woocommerce/myaccount/my-account.php
Notice that our new template folders within our theme’s folder is similar to the WooCommerce template folder structure from templates directory onwards. Any file that you copy across from the WooCommerce template directory (plugin) to the new template directory within your theme’s folder will become the template that your WordPress application will use. You can read more about WooCommerce’s template structure here.
Once you have moved the my-account.php file, open the file in you favourite php editing software. You should see the following:
To help control the layout of the account page we are going to add some standard Genesis Framework column classes to the template. Pretty much all of Genesis child themes have these classes in their style.css file. If you are not sure please open your theme’s style.css file and search for “one-half”, if nothing can be found add the following css coding from this page to your style.css file.
Back to our template file, move to line 29 which contains the code “ do_action( ‘woocommerce_account_navigation’ ); ?>” and add the following lines of code above and below line 29.
This will now create a container for the account menu that will now only take up the first quarter of the page vertically.
Next, on line 31 which contains the following code “<div class=”woocommerce-MyAccount-content”>” add the class “three-fourths” to the div classes,( ie next toe the woocommerce-MyAccount-content class with the quotation marks) . So your file should look something like this.
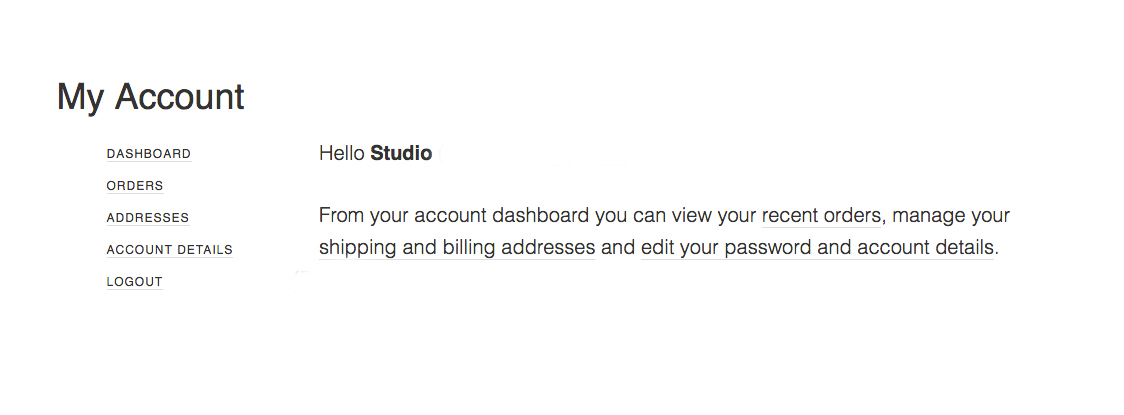
Now, if navigate back to you website and load up the My Account page on the front end, and you will now see the user account menu appears on the left side of the page and the content the right.
Add a bit styling to your WooCommerce account page
Time to fix up the styling, moving back to your FTP program and open your theme’s style.css. Navigate/search for the plugins section or the WooCommerce section if there is one and the following css rules. This will remove the dots on the menu item and change the menu to horizontal format for mobile devices.
So that it, pretty easy isn’t! If you are more comfortable with theme file editing, feel free to download the template files.

Leave a Reply