Adding the right Google fonts to your website can be a time consuming exercise if you don’t know what you are looking for, or what particular look you are after For most folk this because they can not say “yes I like that” until they see it in the website itself. Adding a Google Font is done by using the wp_enqueue_style function in the theme’s function file.
Example:
wp_enqueue_style( 'google-fonts', '//fonts.googleapis.com/css?family=Roboto:300|Raleway:500', array(), CHILD_THEME_VERSION );
And then simple add the font-family to the css files in the appropriate classes:
body {
 color: #000;
 font-family: 'Roboto', sans-serif;
 font-size: 16px;
 font-size: 1.6rem;
 font-weight: 300;
 line-height: 1.625;
 }
To change the Google font that you want to use, you would simply change the font family name and weight, and then change these details in the theme’s css files as well.
Changing from the Roboto font to the Open Sans font would like this:
Roboto font
 wp_enqueue_style( 'google-fonts', '//fonts.googleapis.com/css?family=Roboto:300|Raleway:500', array(), CHILD_THEME_VERSION );
Open Sans font
wp_enqueue_style( 'google-fonts', '//fonts.googleapis.com/css?family=Open+Sans:300,400,600,700', array(), CHILD_THEME_VERSION );
and then again in the theme’s css files:
font-family: 'Roboto', sans-serif;
would change to:
font-family: 'Open Sans', sans-serif;
So for the general user, selecting and implementing a Google font combination for their website can be a big pain in the butt, one has to change the fonts manually by swapping back and forth between the theme’s function and css files and refreshing the browser each time to access and review the font choices. Yes, there are css/php editing programs that can search and replace words, and yes I can here you designers out there shouting that’s why you get a designer to to select your fonts and then you don’t have to go through this process.
But sometimes people just like to do themselves, or at least attempt to do it themselves.

Introducing Kirki
The Kirki Customizer plugin offers a simpler path to adding Google Fonts and other theme options to the customiser panel within WordPress. The plugin can be download via the WordPress Plugin Directory for free and there is no pay addons. So it just free!
The plugin extends the Customizer’s functionality and allows for simpler coding to be used to add theme options. For a demonstration we are going to show you how to add a Google Fonts option to your theme.
Adding Google Fonts with Kirki
As we work within the Genesis Framework, we will doing the demonstration with the Genesis Sample theme. However this can be easily adjusted for any of the Genesis themes or general WordPress theme. Firstly, install the Kirki plugin to your WordPress install via the Plugins > Add New or by uploading the plugin via an ftp program to your plugin folder, and finally activate the plugin.
With the Kirki plugin installed we can can add a configuration by adding code snippets to the theme’s customize.php file. Using an FTP program or something similar, navigate to your theme’s directory.
Then within your theme’s directory folder navigate to and open the file lib > customize.php. If there is no lib directory or customize.php file, create the directory and file, and include – require_once( get_stylesheet_directory() . ‘/lib/customize.php’ ); in you theme’s function file.
As most of themes have some form of customisation options, you will need to navigate to the bottom of the code that is currently in thecustomize.php file and paste the following code snippet . Let’s run through the code so you understand how it words. In the first function ( lines- 12- 23 ) we register a new section within the customiser’s options panel called Fonts. Then we populate the new panel with Google font options to allow us to customise our website (lines 28 – 111) . Within this snippet, we target three particular areas of your website. They are the Site Title font selection ( lines 30 – 53 ), Headings font selection ( lines 56 – 79 ), and lastly the body font selection ( lines 82 – 105).
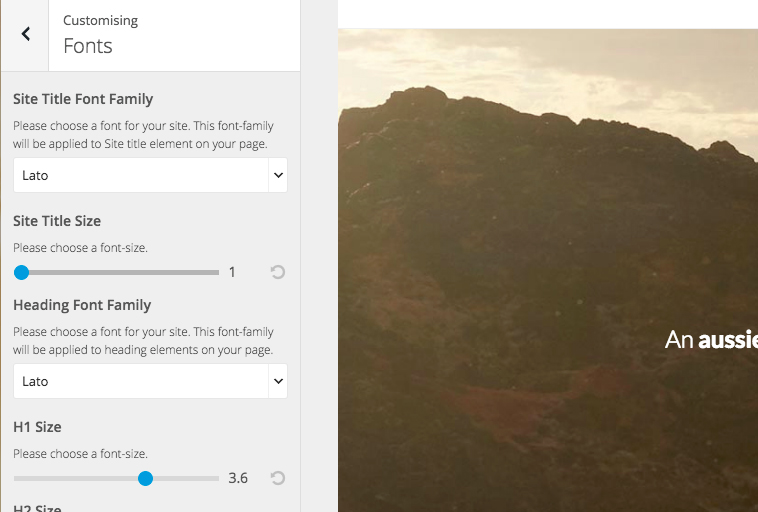
Save off the customizer.php file and then in your WordPress dashboard navigate to the Appearance > Customiser. Towards the top of your customiser options panel on the left, you will now see a new Fonts option. When you open this panel you will see three drop down menus under the headings Site Title Font Family, Heading Font Family and Body Font Family.
Voila! Now you can play to heart’s content with the endless array of Google font pairings!
Now you know how it all works, here is a shortcut. Download this file customizer_google_fonts.php, unzip the file and upload it to your theme’s lib directory, your-theme > lib. Then add this line of code to your theme’s function file, and Voila!
To check out more ways to add options to the WordPress customiser with Kirki visit the plugin documentation page
Leave a Reply