With the roll out of WooCommerce 2.6, one of the many new features the update included was Shipping Zones within the newly configured shipping module. Designed to help manage the shopping module in a more efficient way, shipping zones allows the shop manager to customise the available shipping methods for a particular geographical region.
So what does this all mean? It’s actually quite simple, with shipping zones “local pick up” can be made only available to customers with certain postcodes or International shipping can only be made available for customers outside of your country, and certain couriers only be made available for in a particular state or city.
Let’s run through setting up a basic shipping zone.
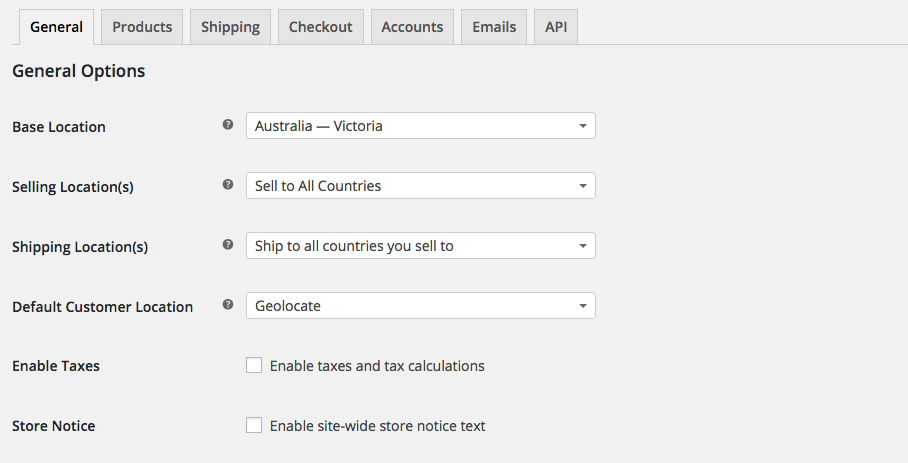
First check that the base store location settings are configured correctly for your online store. In your admin dashboard navigate to WooCommerce > Settings and check that the Base Location, Selling Location(s), and Shipping Location(s) in configured correctly for where you want to sell to and the Default Customer Location is set to Geolocate.
Once these settings have been double checked move over to the Shipping tab on the WooCommerce settings page, and you will see that the shipping page has has a new layout. The shipping option settings are no longer on the first sub-tab, instead the first sub-tab is Shipping Zones, which contain a big meta box with a short description on how the new shipping zones work, and the default “Rest of the World” shipping method. We can ignore the rest of the world zone for the moment.

Adding a Shipping Zone
Click the Add shipping zone button and a new empty zone will be added at the top of the meta box with blank fields across the three columns of Zone Name, Region(s) and Shipping Method(s). Starting on the left, enter a name for the new zone, say “local” and then move across to the Region column.
We are based in Melbourne, so for us we would enter Australia > Victoria in the top field (only Victoria will appear once entered) and then enter the postcodes of your surrounding suburbs (and the suburbs that you would like to allow local pick up) in the field below. Finally, save off your new shipping zone.

Adding the Shipping Method
Next, move over to Shipping Method(s) column and click the Add shipping method link, a pop-up box will appear with a dropdown list that contains the available shipping methods within your WordPress install. Select “Local pickup’ and click the Add shipping method button. The pop-up box should disappear and the new settings will automatically save.
That’s it, pretty simple isn’t! And with a bit of creatively you can configure all sorts of combinations of shipping methods that would be benefitional to your customers.
For more information check out the WooCommerce shipping zones documentation.


Leave a Reply